What Happens To Your Body When You Step On A Power Plate?
What Happens To Your Body When You Step On A Power Plate?
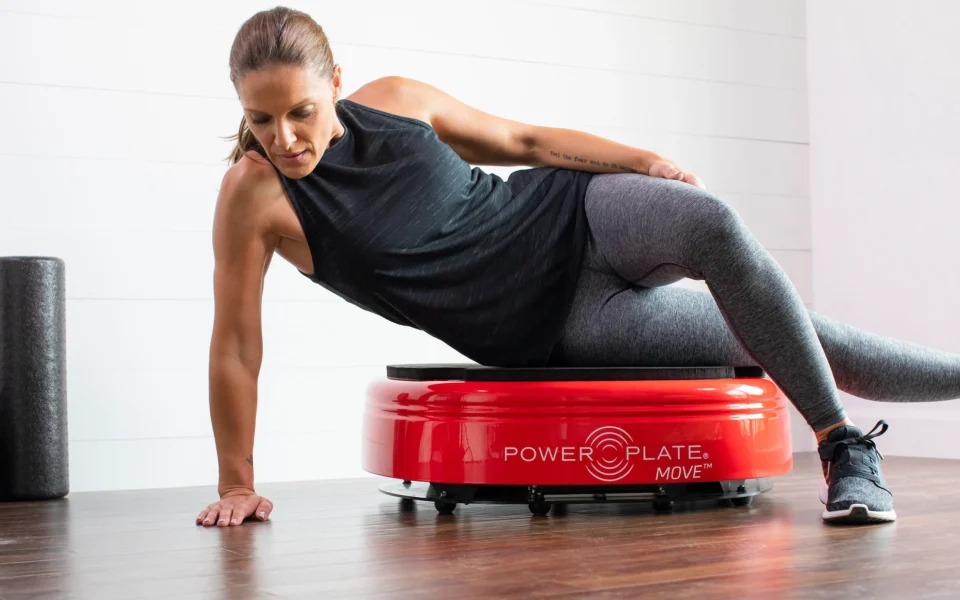
When you stand on a Power Plate for about 9 minutes, you start to experience pain relief in the knees, hips, and lower back. And elsewhere.
Tip: Start at the lowest setting to get acclimated– and then work to higher speeds and higher amplitudes. Lower speeds help your body recover, higher speeds help your body regenerate.
Here is how this process works– and how it sets off a “whole body regenerative cascade.”
1. Muscle Reflex Activation Every muscle in your legs and core contracts and relaxes 30–50 times per second.
→ This constant micro-activation creates a neuromuscular feedback loop that wakes up dormant stabilizer muscles around the knees, hips, and spine — helping restore balance and joint alignment.
Side benefit: Your nervous system gets a “software reboot,” improving coordination and reaction time.
2. Increased Blood Flow The vibration acts like a pump — pushing blood deep into muscles, connective tissue, and joints.
→ This delivers oxygen and nutrients while flushing out metabolic waste and inflammatory byproducts that cause stiffness and pain.
Side benefit: You feel a warm, tingling “circulatory rush” that boosts energy and speeds recovery.
3. Lymphatic Drainage Unlike the circulatory system, the lymph system has no pump. The Power Plate becomes one.
→ Lymph fluid moves up to 50× faster than during walking, clearing toxins, swelling, and inflammation that often collect in knees, hips, and the lower back.
Side benefit: You may notice clearer sinuses, lighter legs, and even a flatter stomach as fluids drain.
4. Joint Decompression Micro-movements in three planes — up/down, side/side, and front/back — cause subtle traction at each joint.
→ This helps release pressure in the spine, lubricate the joints, and re-hydrate the discs — similar to gentle traction therapy.
Side benefit: Heightened flexibility and a greater feeling of “space” in your body.
5. Release of Nitric Oxide Whole-body vibration triggers endothelial cells to produce nitric oxide, a vasodilator.
→ This widens blood vessels, lowers local inflammation, and helps your tissues absorb more oxygen.
Side benefit: Better circulation to skin, muscles, and even the brain — leading to a light, calm, and clear feeling afterward.
6. Growth Hormone & Stem Cell Activation Mechanical stimulation signals bone marrow, muscle tissue and even tendons to release different kinds of stem cells, repair cells and growth hormone.
→ These repair cells circulate to damaged areas (like cartilage and connective tissue), accelerating the healing process.
Side benefit: Over time, collagen production improves — strengthening tendons, fascia, and even skin tone.
7. Pain Gating Effect The vibration “drowns out” pain signals traveling to the brain (similar to TENS therapy).
→ As the brain perceives the strong vibration input, pain messages are temporarily blocked, and muscles around painful areas relax.
Side benefit: A powerful relaxation response — often described as “my body feels switched on, but my pain switched off.”
8. Neurological Recalibration Your proprioceptors — sensors that tell your brain where your body is in space — get recalibrated.
→ This helps retrain movement patterns that may have caused knee, hip, or back pain in the first place.
Side benefit: Improved posture and balance, reducing the risk of future injury.
9. Fascial Release The gentle multidirectional vibration loosens fascial adhesions (knots in connective tissue).
→ As fascia softens, muscles can glide freely again, restoring mobility and range of motion.
Side benefit: You often feel “taller” and lighter after a session — like a deep tissue massage without the pain.
When you stand or move on a Power Plate, you’re sending thousands of gentle vibrations through your body every second.
These vibrations aren’t random — they create micro-movements in your muscles, bones, and connective tissue that your body reads as a powerful “wake-up call.”
This mechanical stimulation turns on repair systems that tend to slow down as we age.
Inside your muscles are special cells called satellite cells. They’re like tiny mechanics sitting dormant until something signals that repair is needed.
Power Plate vibration activates them, helping your muscles recover from soreness, build strength, and even regain tone that’s been lost over time.
The same thing happens deep inside your bones: the vibrations reach your bone marrow, where another type of repair cell lives — mesenchymal stem cells.
These are your body’s master builders, capable of turning into bone, cartilage, or connective tissue. The Power Plate gently nudges them awake, encouraging your body to refresh and strengthen itself naturally.
All of this is happening while your circulation surges. The rhythmic motion acts almost like a second heartbeat, pushing blood and lymph fluid through the body more efficiently.
That means more oxygen, nutrients, and hormones are delivered to tissues that need healing — and waste products are cleared out faster.
As this mechanical activity ramps up, the body releases important signaling molecules. Nitric oxide is one of the first — it relaxes blood vessels and improves oxygen flow everywhere, from your brain to your skin.
Soon after, levels of growth hormone rise, helping build new muscle, strengthen collagen, and restore tissue structure.
Your muscles also release special messenger proteins called myokines, which tell your immune system to reduce inflammation and help coordinate repair across the body.
The result of all this — more active stem cells, better circulation, higher nitric oxide, and natural growth hormone — is what we call a whole-body regenerative cascade. It’s a self-reinforcing cycle where the body senses movement, sends out repair signals, activates its own stem cells, delivers nutrients, and builds itself stronger with every session.
Most people feel it quickly — muscles loosen, joints move more freely, and energy returns.
But beneath the surface, your cells are working together to renew your tissues, improve circulation, and restore the biological rhythm of recovery. In short, Power Plate helps your body remember how to heal itself — something it’s always known how to do.
Source: https://powerplate.com/blogs/news/what-happens-to-your-body-when-you-step-on-a-power-plate